
Context / Disclaimers#
Malediction is a “Miniatures Card Game” (like a mix between WH40k and MTG with all their crappy aspects removed), where you print your own miniatures. I didn’t have the time/drive to fully get into it yet, but I am working with a friend on printing our own miniatures - he prints the characters on his SLA printer, I take care of the character bases and terrains on my X1C.
I’m by no means an expert on printing miniatures - the vast majority of the stuff I ever printed was mechanical parts I designed myself, with vastly different constraints. But taking my 3d printing experience and adjusting it to a different set of goals was an interesting challenge, so let me share what I ended up with.
I will not be sharing my printing profiles - I believe it hinders beginners more than it helps them. I will go through the adjustments I made to the profiles I built up over the years.
To successfully use the info below, you’ll need an FDM printer that works well - a well-tuned Prusa or a well-maintained BambuLab machine. I’m using BambuStudio, but pretty much all the settings should map easily to PrusaSlicer or Orca.
Basics#
For my (recent) prints I used Basic PLA and a 0.4mm nozzle.
For miniatures we want the best detail quality and robust printing, so I don’t think there’s a reason to use anything other than PLA. I tried using Bambu’s “Matte PLA”, but it turned out to be a huge pain, and IIRC it does wear out the nozzle more than your regular PLA. The miniatures are going to be primed anyways, so having the matte finish isn’t as much of a benefit as it might seem.
I did some prints with 0.2mm nozzle, but (naturally), the prints took much longer1 and were much more likely to fail. The increase in surface quality wasn’t nearly big enough to justify the downsides - subjectively the main factor is the layer thickness.
I usually print my “mechanical” parts using a 0.8 nozzle and I’m happy with the results - only the details like fastener holes/sockets ever need any adjustments to compensate for the loss in precision.
It could be argued that print settings are driven by the push/pull of 3 different aspects: finish quality, print robustness/strength and the print time/speed - let’s go through the settings related to each of those.
Quality#
I’m using a 0.12mm layer height (with the default 0.2 for the initial layer). It’s small enough that the layer lines are not too obvious on vertical-ish surfaces, and big enough to be relatively fast and robust.
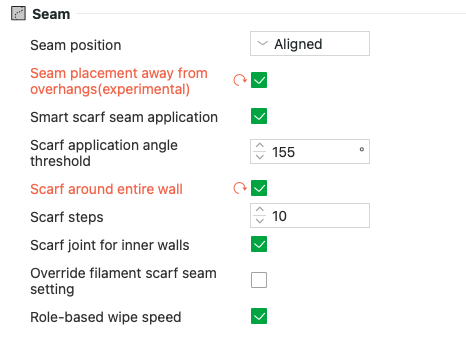
With miniatures an aligned seam seems to be the way to go - it looks better than seam marks scattered around the miniature and is easier to sand down if you can be bothered.
It’s worth it to enable the scarf seams, if your slicer supports that and if it doesn’t impact print robustness in your case.
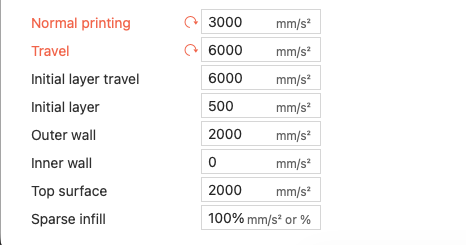
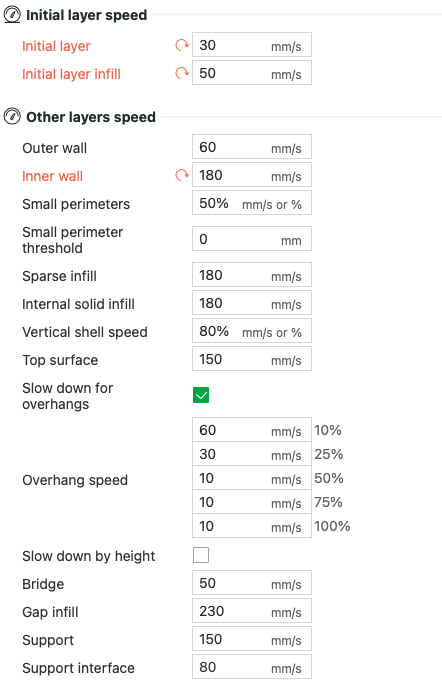
To help the printer do its best on the quality front I made sure the outer wall speed and acceleration values were low - 60mm/s and 2000mm/s2 respectively - it does impact the overall print time, but the time to print inner walls are still the dominant factor.
I recently became a fan of lowering the acceleration values in general - it makes the printing quieter, puts less wear on the printer itself and possibly gets rid of some artifacts. You can play with the settings and see how they impact the print time, but on a random print lowering the default acceleration from 4000 to 3000 was about a 5% change in the print time. But the more you lower the values, the bigger the impact on print time is - it’s worth finding a good compromise
Robustness / Strength#
Surprisingly, that was the main issue for me - before I made some some tweaks I had many failed prints, sometimes losing me days of progress.
We want all the bed adhesion we can get. I only ever used “the glue stick” when printing the miniatures and it seems to do a good job. I keep the initial layer speeds low - 30mm/s in general and 50mm/s for the initial layer infill. Once the initial layer prints well we can go much faster in the rest of the print and not worry about raised corners / detached supports.
Other than that: 3-4 walls and 5 bottom/top shell layers works for me.
Supports#
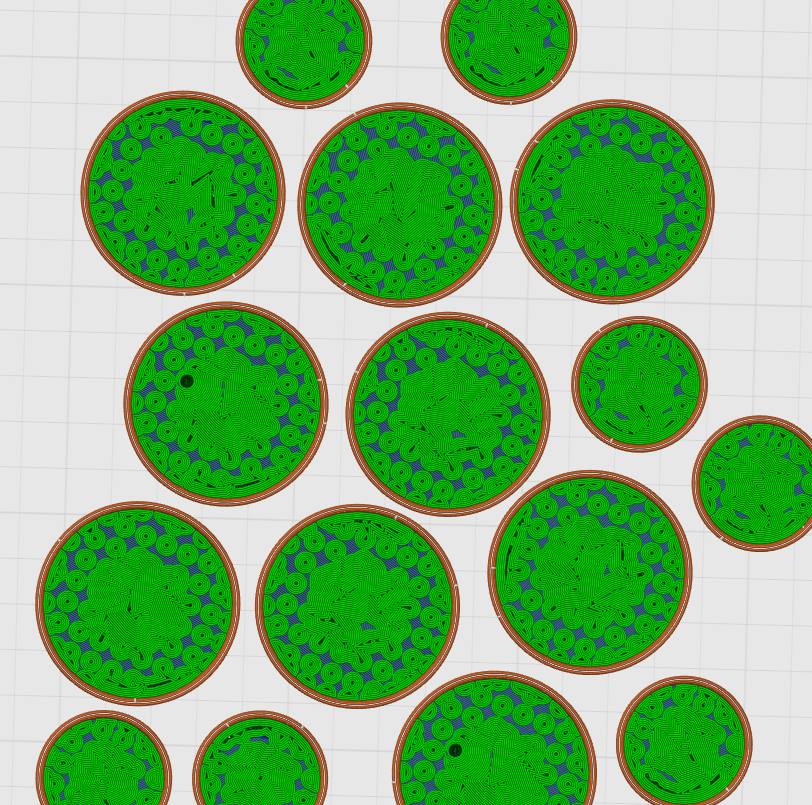
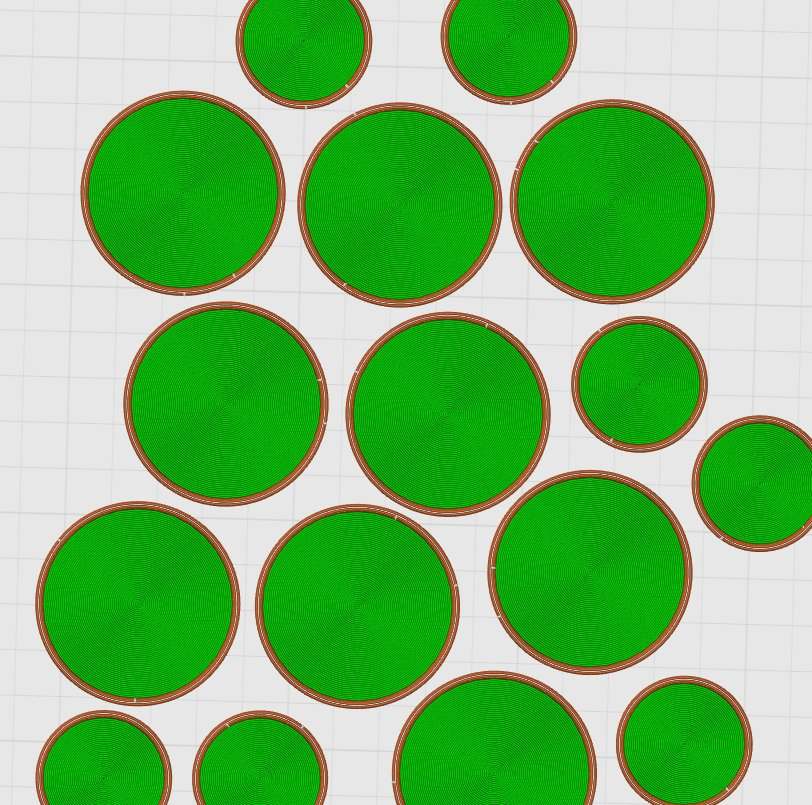
There’s rarely ever a reason to go for “normal” supports, and with tree supports you can handle pretty much all the Malediction terrains with “on build plate only” on. Supports growing from the print itself either detach easily and fail when you need them the most, or don’t detach at all and give you a painful evenings of post-processing the prints.
The above are my default settings for terrains, but I still look at the auto-generated supports and add some manual ones whenever the slicer seems too optimistic.
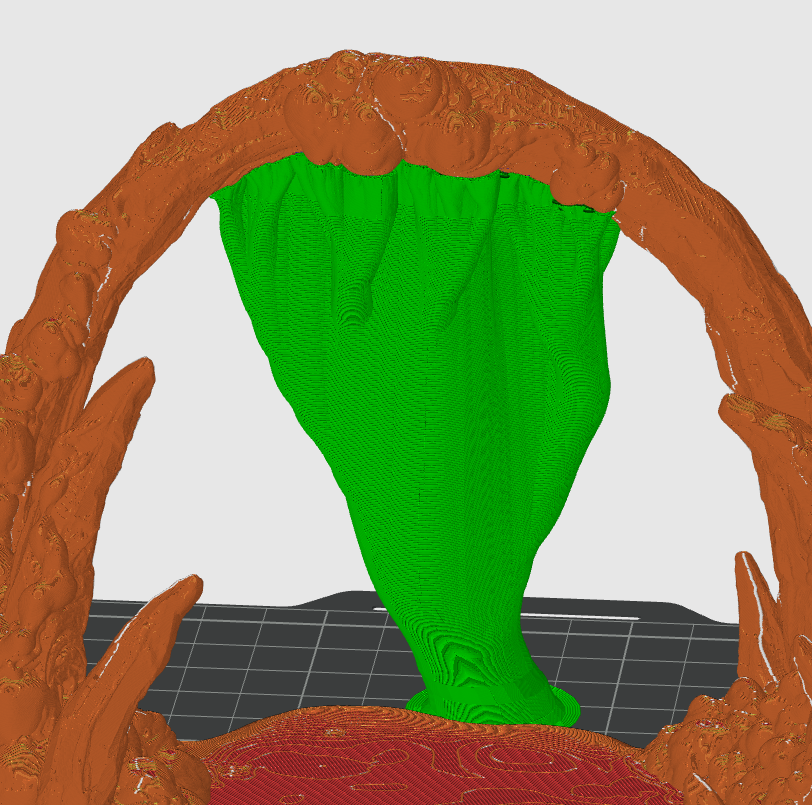
So as an example, I trust the one on the right much more than the one on the left 😀
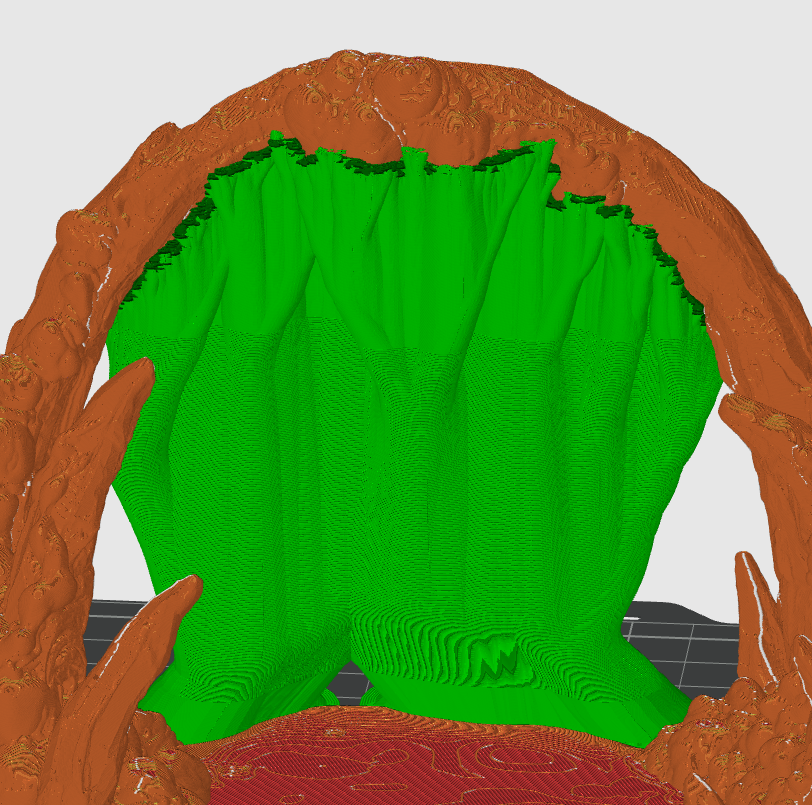
One caveat here is supporting underneath the miniature bases - that’s a case where your regular tree supports don’t really make sense. For those you can either switch to “normal” supports, or a tree variant that does a sensible thing, like the “Tree Hybrid” in BambuStudio.
(“Tree Strong” on the left (bad), “Tree Hybrid” on the right (good))
I have updated my default support settings to a more robust configuration, see below:
Again, it turned out that using good sensitive defaults and slightly modifying them is the way to go:
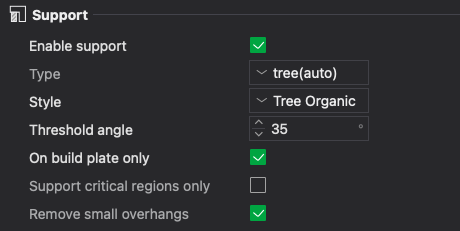
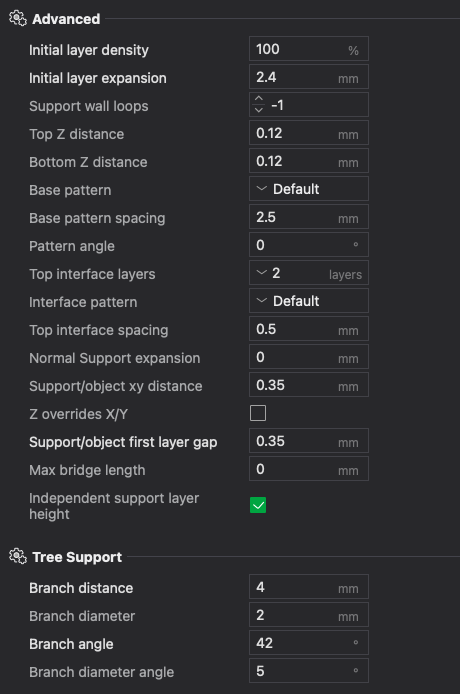
The main changes here are:
- support/object x/y distance / first layer gap - the default settings are unnecessarily tight, this makes support removal easier and leaving fewer marks.
- initial layer density - again, we want all the bed adhesion we can get
- branch distance/diameter/angle - I found a combination that is still strong, but allows supports that lean quite a bit (which they often need to since they’re
on build-plate only), and a branch diameter that’s small enough to be easy-ish to remove
I also toyed with hardcoding support wall loops to 2, but it made the supports “too strong” - I was sometimes worried I’d break the model itself, not the support I was trying to remove.
Infill#
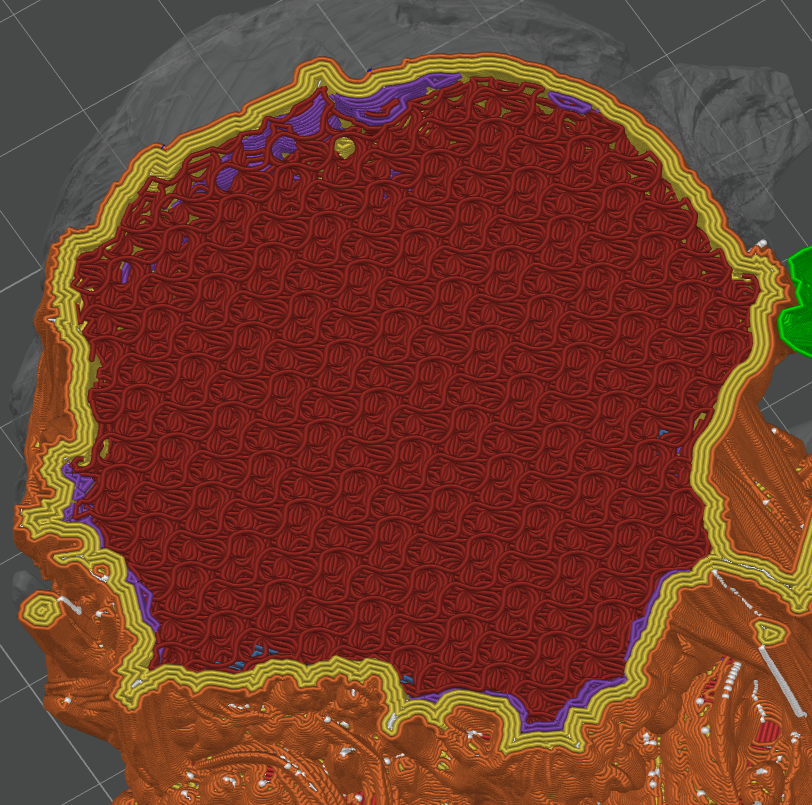
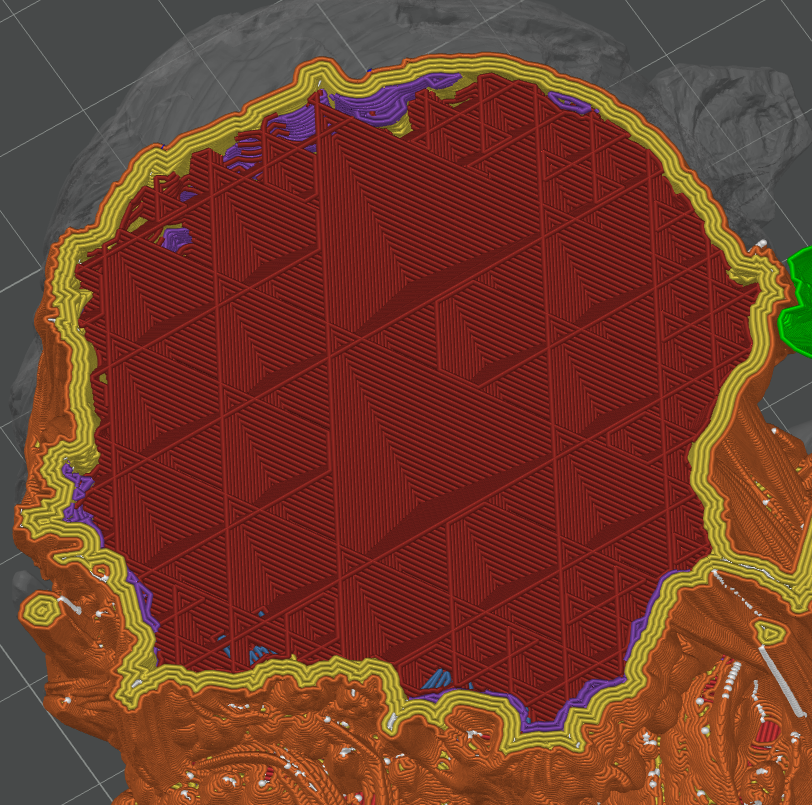
Those are not technical parts, so the infill configuration isn’t all that important. I use gyroid at 22% in most of the cases and adaptive cubic at 40% (sic!) for more blocky terrains.
Gyroid is a strong infill that doesn’t cause tension/raised corners the same way grid or rectilinear does, at the cost ofa longer print time. It’s also loud as all hell when printed and shakes the whole printer violently, unless you lowered the infill acceleration values like I did 😀.
Adaptive cubic is clever, because it lets you have relatively dense infill close to the walls while not wasting filament in the center areas of larger objects. The 40% value looks big, but it’s still rather tame compared to the 22% of gyroid:
Speed#
My speed settings aren’t too high, I think the real print time gains are elsewhere.
We want a low layer height in the print itself, but there’s no good reason why the supports and the sparse infill should be printed “thin” as well - they actually work better if they’re thicker.
We can optimize that by enabling independent support layer height in the support settings and infill combination in the infill settings.
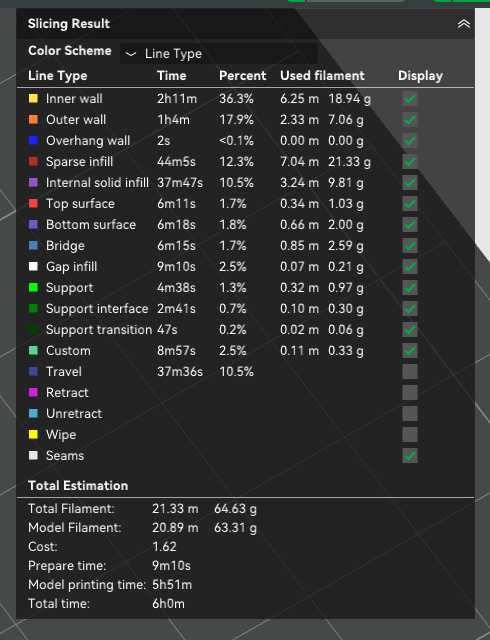

As you can see above, without those settings enabled the print takes over 20% more time and results in worse quality!
- It’s not even that “half the nozzle size = twice the print time”, it’s worse than that. The strength of the print also suffers, see CNCKitchen’s videos.